
Laundry Room Maintenance with Kenmore, Amana and John Lewis Manuals
 A washing machine starts shaking violently during the spin cycle. A dryer needs two cycles to dry a load of towels. A front-loading washer develops a musty smell even though the laundry comes out clean.
These problems do not always mean that an expensive repair is necessary. An uneven load, restricted dryer airflow or moisture trapped around a door seal may explain the symptoms. However, persistent problems can also indicate mechanical faults that require professional attention.
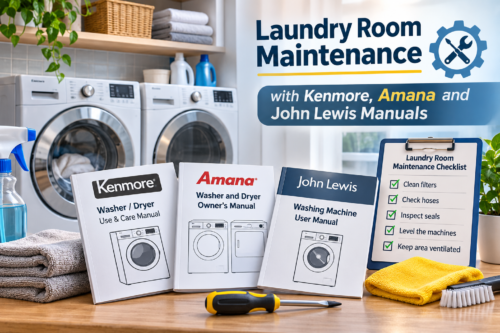
Effective laundry room maintenance begins with correct installation, regular cleaning and an understanding of the equipment’s operating instructions. Whether you own a Kenmore, Amana or John Lewis appliance, the right manual helps you identify safe maintenance tasks, understand warning signs and avoid unnecessary repairs.
Find the Right Manual Before Starting Maintenance
Washing machines and dryers can have different maintenance requirements even when they look nearly identical. Installation clearances, filter locations, cleaning procedures and error codes may vary between models from the same brand.
Start by finding the appliance’s identification label. Depending on the model, it may be located around the door opening, beneath the lid or on an accessible rear surface.
Record the complete model number, including letters, numbers and punctuation. Photograph the label so you can refer to it when searching for instructions or contacting support.
Kenmore: Check the Complete Model Number
Kenmore appliances have historically been manufactured by several companies. This makes the complete model number particularly important when identifying compatible documentation and replacement parts.
On many older Kenmore appliances, the numerical prefix before the decimal point identifies the original manufacturer. For example, the prefix 110 is commonly associated with Whirlpool-manufactured machines.
However, identification systems can differ across product generations. Always verify the complete model number rather than relying on the prefix alone.
Use kenmore manuals to locate installation instructions, cleaning procedures and troubleshooting information for your appliance.
Amana: Follow Model-Specific Installation Instructions
Amana laundry appliances are commonly found in North American households. Their maintenance requirements depend on the machine’s design, capacity and available features.
For example, leveling procedures, shipping restraints and recommended load sizes can differ between models.
Search amana manuals using the complete model number. Pay particular attention to the installation and troubleshooting sections before making adjustments.
John Lewis: Confirm Regional and Electrical Requirements
John Lewis-branded laundry appliances are commonly associated with the UK market. Depending on the product, they may have different electrical, drainage and installation requirements from machines designed for other regions.
If an appliance has been moved between countries, confirm that its rating plate matches the available electrical supply. Do not assume compatibility based only on the plug shape.
Find the appropriate instructions through john lewis manuals and verify the model and intended market before following installation or maintenance guidance.
Third-party manual directories are useful starting points, but they do not guarantee that every document is current or applicable. When information is missing or uncertain, consult the manufacturer or an authorized service provider.
Start Laundry Room Maintenance with Safe Installation
Correct installation can prevent many avoidable operating problems. A washing machine needs stable support and appropriate water connections, while a dryer requires the ventilation or condensate-management arrangement specified for its design.
Before adjusting equipment, compare the installation with the manufacturer’s instructions.
| Installation item | What to check | Why it matters |
| Shipping restraints | Confirm that transport bolts or restraints were removed as instructed | Remaining restraints can cause severe vibration and damage |
| Leveling feet | Ensure the machine is stable and properly supported | An unstable cabinet can move or bang during spinning |
| Water supply | Inspect accessible hoses for kinks, damage or visible leaks | Poor connections can affect filling and create water damage |
| Drain hose | Confirm the correct position and routing | Incorrect installation can contribute to drainage problems |
| Electrical supply | Match the appliance rating plate and installation requirements | An unsuitable connection creates electrical and fire hazards |
| Dryer exhaust | Check the specified duct material, routing and clearance | Restricted airflow can increase drying time and overheating risk |
Balance the Washer Before Adjusting Its Feet
A washer that moves excessively during spinning may simply have an unevenly distributed load.
Heavy towels, bedding and other bulky items can collect on one side of the drum. A single heavy item may also be difficult for the machine to balance.
If excessive movement occurs:
- Pause the cycle safely. Follow the manual’s instructions and wait until the drum has stopped.
- Redistribute the laundry. Separate tangled items and spread the load more evenly.
- Check the recommended capacity. Avoid overloading and follow any guidance for bulky or individual items.
- Inspect the machine’s stability. Confirm that it stands firmly without rocking.
- Check the installation instructions. Adjust the leveling feet only as the manufacturer directs.
If severe vibration continues with a suitable load and correctly installed machine, stop using it and arrange professional inspection.
Do not attempt to stabilize a washer by placing improvised materials underneath it.
Clean the Washer and Dryer Safely
Routine cleaning helps maintain washing performance, reduce unpleasant odors and keep dryer airflow unobstructed.
The correct procedure depends on the appliance. Only remove components that the manufacturer’s instructions identify as user-accessible.
Clean the Detergent Drawer, Drum and Door Seal
Detergent residue, fabric softener and moisture can accumulate inside washing machines.
Where the manual permits, remove the detergent drawer and rinse away residue using the recommended cleaning method. Wipe the accessible drawer compartment before reinstalling it.
On front-loading washers, inspect the door seal and its folds for trapped moisture, lint and detergent buildup. Clean these areas with an approved product and a soft cloth.
To reduce recurring odors:
- Allow the drum and accessible surfaces to dry after use, following the manufacturer’s instructions and keeping children and pets safe.
- Use the recommended detergent type and quantity, including high-efficiency detergent where specified.
- Run the appliance’s drum-cleaning or maintenance cycle at the interval stated in its manual.
- Remove visible residue before it develops into persistent buildup.
Never mix household cleaning chemicals. In particular, combining chlorine bleach with ammonia-containing or acidic products can release dangerous gases.
Keep Dryer Lint and Airflow Paths Clear
A lint screen captures fibers released during drying, but it does not necessarily prevent buildup elsewhere in the airflow system.
Clean the lint screen before or after each load, as specified by the dryer manufacturer.
For vented dryers, inspect the accessible exhaust path and external termination according to the maintenance instructions. A crushed hose, blocked outlet or accumulated lint can reduce airflow and increase drying time.
Use only the exhaust materials and installation arrangements approved for the dryer and permitted by local requirements.
If the exhaust system is inaccessible, heavily obstructed or requires disassembly beyond owner-level maintenance, arrange professional cleaning.
Do not continue operating a dryer that shows signs of overheating or persistently restricted airflow.
Maintain Condenser and Heat-Pump Dryers
Condenser and heat-pump dryers use different moisture-removal systems from conventional vented dryers.
Depending on the model, routine maintenance may include:
- Emptying the condensate container at the interval specified in the manual, unless the dryer uses an approved drain connection.
- Cleaning lint filters using the documented procedure.
- Checking an accessible drain hose for kinks or displacement.
- Cleaning the condenser or heat exchanger only when the manufacturer identifies it as user-cleanable.
Some heat exchangers are designed to remain enclosed or use automatic cleaning systems. Attempting to remove or wash them without the correct instructions can damage the appliance.
Keep a Simple Maintenance Schedule
Record the cleaning and inspection intervals for each machine, along with the next due date.
Check sooner if you notice unusual odors, excessive residue, slow drying or other changes in performance.
A maintenance schedule helps prevent forgotten tasks, but it should follow the appliance’s instructions rather than a universal interval.
Match Common Laundry Problems to Safe First Checks
When an appliance behaves unexpectedly, begin with the symptom and consult the troubleshooting section of its exact model manual.
A symptom can have several possible causes. Avoid replacing parts or resetting equipment repeatedly without understanding the problem.
| Symptom | Possible cause | Safe first check | When to seek service |
| Heavy washer vibration | Uneven load, unstable feet or remaining shipping restraints | Redistribute the laundry and verify installation | Shaking continues with a balanced load |
| Poor draining | Kinked hose, incorrect drain arrangement or blockage | Inspect accessible hose routing and permitted filters | Drainage problems persist or require disassembly |
| Slow dryer performance | Lint buildup, restricted airflow, overload or unsuitable cycle | Clean the lint screen and check the load and accessible vent | Drying remains poor or overheating is suspected |
| Musty washer odor | Moisture, detergent residue or insufficient cleaning | Clean accessible surfaces and run the specified maintenance cycle | Odor persists despite recommended care |
| Displayed error code | Model-specific operating condition or fault | Record the complete code and consult the matching manual | The manual requires service or the fault persists |
Check the Washer Before Blaming the Dryer
Clothes that enter the dryer unusually wet naturally require more time to dry.
Before assuming the dryer is defective, check whether the washer completed its intended spin cycle.
A low spin setting, unsuitable load or drainage problem can leave excessive moisture in the laundry.
Follow the washer’s instructions to identify whether the selected program and spin performance are appropriate.
Record Error Codes Before Resetting
An error code may refer to a temporary operating condition or a fault requiring professional diagnosis.
Write down the exact characters, including any flashing patterns or alternating messages.
Record when the problem occurs, which cycle was running and whether the appliance displayed other symptoms.
Use the matching manual to determine which checks are appropriate. Do not repeatedly reset a machine that returns to the same fault.
Recognize When Maintenance Is Not Enough
Stop using an appliance if you notice damaged wiring, a burning smell, repeated electrical protection trips, severe unexplained vibration or signs of overheating.
For gas dryers, a suspected gas leak requires immediate precautions. Leave the affected area without operating electrical switches or using a phone inside. Contact the gas utility or local emergency services from a safe location.
Electrical repairs, gas connections, internal mechanical work and other procedures beyond the owner’s manual should be handled by qualified professionals.
Regular laundry room maintenance is most effective when it combines simple cleaning, correct loading and careful attention to installation requirements. By following model-specific Kenmore, Amana and John Lewis documentation, owners can address straightforward problems safely, recognize warning signs earlier and provide technicians with useful information when repairs are necessary.
About The Author