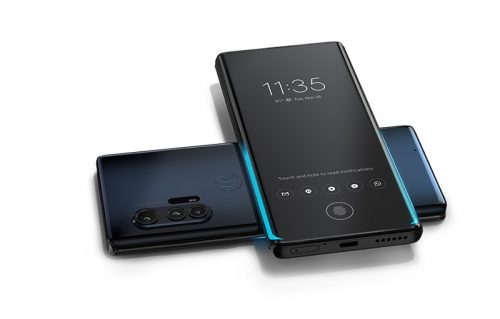
 Motorola Edge/Plus already have one of the flagship camera from Motorola. But all users still want to install Google Camera/GCam on their Motorola Edge/Plus Phone.
Motorola Edge/Plus Camera Specification
| Quad | 64 MP, f/1.7, (wide), 1/2.0″, 0.7µm, PDAF, Laser AF 16 MP, f/2.2, 121? (ultrawide), 1.0µm, PDAF 2 MP, f/2.4, (depth) TOF 3D |
| Features | Dual-LED flash, ring flash (macro mode), panorama, HDR |
| Video | 6K@30fps, 4K@30/60fps, 1080p@30/60/120fps, gyro-EIS |
This Google Camera is capable of making use of all the Camera Lens available on the phone.
What is Google Camera (AKA GCam)?
Google Camera is the camera app for the Google Nexus and Google Pixel phones. It is not designed or intended to be run on other phones.
Installation instructions
1 – Click here to download the latest GCam APK optimized for Motorola Edge/Plus
2 – Install the APK
3 – Give all the requested permissions
4 – Download Config XML for Motorola Edge/Plus
5 – Open the Google Camera and Load the Config XML
More Google Camera XML for Motorola Edge/Plus:
Config XML Day Mode for Motorola Edge/Plus
How to Load XML Configs
This GCam versions for Motorola Edge/Plus support import/export of .xml files, allowing users to quickly load the best settings for their phone.

Some GCam versions support import/export of .xml files, allowing users to quickly load the best settings for their phone.
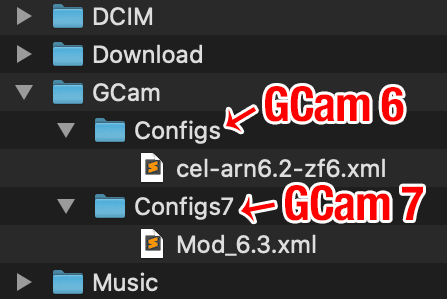
Config files are stored in a folder:
GCam 8.x: /GCam/Configs8/
GCam 7.x: /GCam/Configs7/
GCam 6.x: /GCam/Configs/
This folder must be created manually using a file manager or automatically by saving your config.
The top folder, /GCam/, must be created on the same level as the DCIM, Downloads, etc, folders. Example:
To load a config file, move the .xml file to the configs folder, open Google Camera, double click the dark area around the capture button, select the config, and then click on “restore”. Sometimes you have to do it twice.
If GCam restarts, it means that the config file has been loaded.
CHOOSE BETWEEN HDR+ AND HDR+ENHANCED
HDR aka (High Dynamic Range) increases the Dynamic Range, the difference between details in the darkest parts of the picture and not washing out in the brightest parts.
HDR+ is just a larger range on this and HDR+ Enhanced even larger again. Basically the phone takes a range of pictures and it combines the underexposed bright parts and the overexposed dark parts into one picture.
If you leave it set to Enhanced, it will almost always give you the best effects and image quality as it gives itself a little longer time to bring together the image.
The only times usually to use HDR+ is when your needing quick snaps of a moving object or if you want a faster shutter image.
Changes:
• Improved NoiseModeler and fixed noise grain and blur
• Added latest opmodes (Thanks Arnova8G2)
• Added AUX device models and NoiseModeler (Thanks overwhelmer)
• Added exposure compensation for AUX
• Added Resampling for sensors without Sabre (Thanks onFire)
• Replaced Pixel Binning button in viewfinder (Thanks Arnova8G2)
• Fixed Redmi Note 8 Pro black viewfinder (Thanks Wyroczen)
• Fixed Sabre on main sensor
• More aux icon styles: “Dots”
• Updated translations
• Some small changes and fixes
Notes:
• Finally, fixed. First properly working GCam 7.4: NoiseModeler should help now for camera sensors with blur or noise grain. Enable it first and then choose better Denoise model. It works for Main, Front and AUX (separated)
• Fully support of Redmi Note 8/9 devices
• Do not apply XMLs from other devices because AUX may be broken with wrong IDs
HOW TO INSTALL:
+ Download the files available;
+ Install the APK downloaded;
+ Move the XML and Load it.